Five stages decide what a carbide edge does in service: the powder that becomes the insert, the press that shapes it, the furnace that densifies it, the join that holds it to the steel, and the inspection that catches what the first four missed.
Understanding the chain matters to a buyer because each stage produces a document, and those documents are what a claim, a tender or a fitment question is answered from. This is the chain, with the check that belongs to each step.
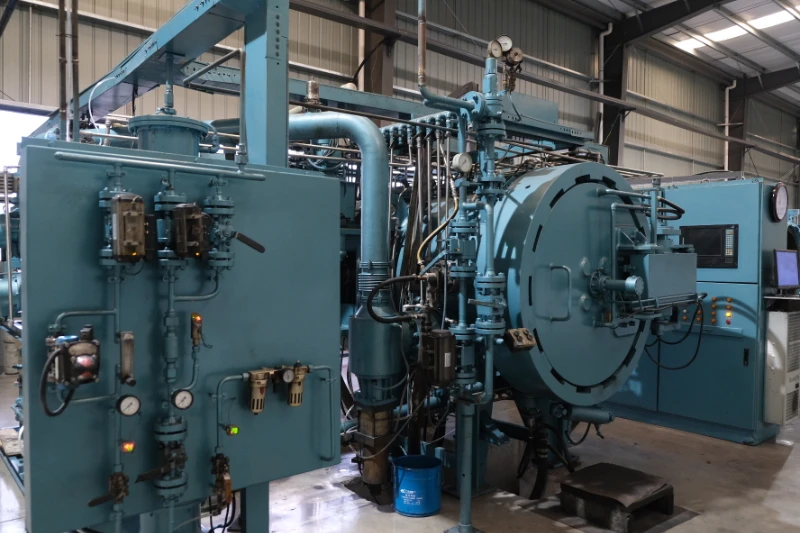
Snow plow blade manufacturing: the chain in one view
The chain has five stages and each one leaves a record.
Powder handling sets the grade, pressing sets the shape, sintering sets the density, joining attaches the insert to the steel, and finishing and inspection release the lot.
Two of those stages are metallurgical and two are mechanical, which is why the failure modes differ so much. A problem in the powder or the furnace shows up as a material defect: porosity, a soft insert, or a dimension that moved during shrinkage. A problem in the joining or the finishing stage shows up as a mechanical defect: a loose insert, a cracked body, or a pattern that will not fit the machine.
Separating the two categories is useful before any technical discussion begins. A supplier that can name which stage produced a defect is working from records; one that describes the product instead is working from a catalogue.
Raw material selection and powder handling
The grade is decided before anything is pressed, in the blend of carbide powder and binder and in how that blend is handled.
Cemented carbide is a composite: hard tungsten carbide grains held together by a metal binder, usually cobalt. The proportion of binder and the size of the grains set the balance between wear resistance and toughness, and that balance is what makes one grade suitable for abrasive gravel and another for impact loading on rough roads.
The handling stage matters because the powder is the product. Contamination, moisture and segregation during storage all change how the blend compacts, and none of them are visible in the finished insert until a lot fails inspection. The incoming material batch and the blend are therefore the first records a lot should be traceable to.
Pressing inserts to near-net shape
Pressing gives the insert its shape at close to final dimensions, with an allowance for the shrinkage that sintering will produce.
The powder is filled into a die and compacted, and the pressure has to be even through the section, or the piece will have a density gradient that survives into the finished part. That is why the press, the tooling and the fill behaviour are treated as one system rather than three variables.
| Stage | What it sets | Typical defect if it drifts |
|---|---|---|
| Powder blend | Grade: hardness, toughness, grain structure | Wrong wear behaviour; inconsistent density after sintering |
| Pressing | Shape and green density distribution | Internal density gradient; distorted part after sintering |
| Sintering | Final density and microstructure | Porosity, cracks, out-of-tolerance dimensions |
| Joining | Retention of the insert on the steel body | Loose or lost inserts; insufficient bond area |
| Finishing and inspection | Fitment, appearance and release | Bolt pattern out of position; incomplete records |
Read the table as a chain of tolerances rather than as a list of departments. A dimension that is out of tolerance at the end may have been correct in the die and moved in the furnace, which is why the record has to be read by stage.
Sintering and densification
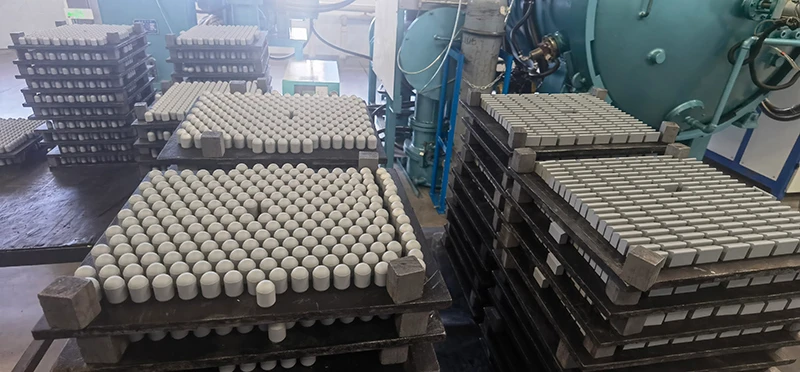
Sintering is where the pressed powder becomes a solid, and it is the stage that converts every earlier variation into a finished property.
The part is heated to a temperature below the melting point of the carbide but high enough for the binder to flow, so the grains bond and the piece densifies and shrinks. The furnace curve, the atmosphere and the cooling rate all influence the result, and the curve is what the batch record should show.
- Heat to the point where the binder becomes mobile, with the part still supported to limit distortion.
- Hold long enough for densification, without allowing grain growth to run away.
- Control the atmosphere so the binder is not degraded during the cycle.
- Cool at a rate that limits residual stress in the finished insert.
- Record the cycle against the batch, so the result can be traced back to it.
The fifth step is the one a buyer should ask about directly. A furnace record that can be retrieved from a lot number is evidence of control; a description of the furnace is not.
Base plate preparation and fixturing
The steel body is prepared before any carbide is attached, and the preparation decides whether the joint can be made properly.
The plate is cut, formed and drilled to the fitment pattern, and the surfaces that will take the braze are cleaned and prepared so the filler metal can wet them. Fixturing matters as much as cleaning: a jig that holds the insert in position while the joint is made is what allows the pattern and the insert spacing to be repeated from piece to piece.
Fitment patterns come from the machine rather than from the manufacturer, which is why published references matter. Standards work from the American Association of State Highway and Transportation Officials and equipment standards from SAE International describe the patterns that fleet equipment expects, and a supplier that works to them is working to something a buyer can check.
Brazing inserts into position
The join is made by brazing, in which a filler metal melts below the melting point of both the carbide and the steel and bonds them without melting either.
The sequence is short and unforgiving: prepare the surfaces, place the filler and the flux or use a controlled atmosphere, bring the joint to the flow temperature, hold until the filler has wet both faces, and cool under control. Each step has a failure mode, and most of them are invisible from the outside.
- Clean and prepare the two surfaces, because contamination prevents wetting.
- Place the filler metal so it can flow through the joint by capillary action.
- Heat the assembly evenly; the carbide and the steel do not conduct or expand alike.
- Hold at flow temperature long enough for the filler to wet the full joint face.
- Cool under control, since the carbide is brittle and tolerates thermal shock poorly.
- Inspect the joint and record the result against the lot.
The third step explains why the method matters. A manual torch moves heat into one area at a time, while an automated induction process applies it in a repeatable pattern, and the difference shows up in the proportion of joints that are properly bonded rather than in the appearance of the ones that are. The process is described on the factory page.
Finishing, inspection and marking
Finishing brings the part to its final dimensions and inspection releases it, and both stages exist to catch what the earlier ones could not.
Grinding and edge preparation set the profile and the surface condition. Dimensional inspection checks the critical dimensions against the drawing revision. Then the marking is applied, and the packed lot is released against the document set. Where the item is custom, this is also the stage at which the first article is compared with the approved sample.
The document set that travels with the lot is the buyer’s substitute for presence, and it is described on the quality control page. A lot that arrives with a complete pack has been released against something; a lot that arrives with a packing list has not.
Where variation is controlled
Variation is controlled at the stage that creates it, not at final inspection, and that is the principle behind stage-by-stage quality control.
Incoming material is checked so the blend starts from a known point. Process parameters are recorded at pressing, sintering and joining so a change can be detected where it happens rather than downstream. Inspection is applied at the stages whose defects cannot be seen later, which is why the joining record exists at all: a complete absence of bond area can hide under a visually acceptable edge.
The practical consequence for a buyer is that a supplier’s control system is visible in what it records, not in what it claims. A process that is genuinely controlled produces records without being asked.
What buyers should verify
Verification does not require visiting the plant, but it does require asking for specific items rather than for assurances.
The questions below are the ones that map directly onto the stages above, and each has an answer that can be produced from a lot number or not produced at all.
- Which stages are performed in house, and which are subcontracted to another plant.
- What the dimensional record contains, and which dimensions it names as critical.
- What the joining inspection consists of, and whether the result is recorded per lot.
- How a delivered piece can be traced back to its material batch and its process record.
- What the drawing revision on the record is, and how a revision change is communicated.
Material and process standards that a specification can reference come from bodies such as ASTM International and the American Society of Mechanical Engineers, and the buying practice behind fleet specifications is published by the Snow and Ice Management Association and the equipment manufacturing body, the Association of Equipment Manufacturers.
The records each stage produces
Each stage of the chain produces a specific document, and the set together is what makes a lot traceable.
Powder handling produces the material declaration and the incoming batch reference. Pressing and sintering produce the process record for the cycle. Joining produces the inspection result for the joint. Finishing produces the dimensional record and the marking. Release produces the packing list and the batch reference that ties everything together.
- Material declaration, referencing the incoming batch.
- Process record for the pressing and sintering cycle.
- Joining inspection result for the bonded inserts.
- Dimensional record against the drawing revision.
- Packing list and the batch reference printed on the part or the label.
Read as a set, those five documents answer every question a buyer can reasonably ask about a delivered lot. Individually they answer very little, which is why a partial pack is more dangerous than an obviously missing one.
What changes when an edge is custom
A custom edge runs the same chain with two additions at the front and one at the end of the sampling stage.
The additions at the front are the fitment review, where the pattern is confirmed against the machine, and the tooling decision for any profile that is not already in production. The addition at the end is a first article, which is measured and approved before the batch is released. Everything after that follows the standard chain.
The practical difference is timing rather than process. A custom item spends longer in preparation and approval, and once those are settled it runs down the same route as a catalogue item, with the same records and the same joining step. A supplier that treats a custom order as a separate process rather than as an additional step on the same chain is usually a supplier assembling rather than manufacturing.
FAQ
What metal are carbide plow blades made of?
The wear element is cemented tungsten carbide, a composite of tungsten carbide grains held in a metal binder, usually cobalt. The body of the edge is steel, and the two are joined by brazing rather than by welding the carbide itself.
Why not make the whole blade from carbide?
Because the edge has to be mounted, bolted and occasionally bent without cracking. Carbide is hard and wear-resistant but brittle in tension, so it is used where it wears and steel is used where the load and the fastening are taken.
Which stage most often decides blade life?
The joining stage, in most field failures. A poorly densified insert is usually rejected at inspection, while a weak braze joint passes a visual check and fails later when the insert is loaded, which is why the brazing record matters as much as the grade.
Can a buyer verify the process chain without visiting the plant?
Yes, from the records. Which steps are performed in house, what each lot’s dimensional and joining records contain, and how the batch reference links the delivered piece to its production record. A supplier that performs the steps can produce those documents from a lot number.
If you want the process chain rather than a product description, ask SENTHAI for the document set that travels with a lot. It shows which stages ran in house and what each one recorded.