Changing a cutting edge in freezing rain is a controlled task, not an emergency repair. The edge itself is straightforward to swap; the difficulty is the conditions. Freezing rain creates a wet, glazed surface on the moldboard, the hardware, and the operator’s gloves, and it changes how torque values behave. Plan the change around three things: safe access, correct hardware handling, and a verification step before the plow returns to service.
Why freezing rain changes the job
Freezing rain deposits a clear ice layer on any surface below freezing, including steel that has been sitting outside. That layer affects footing, tool grip, and the friction fit between the edge, the moldboard, and the fasteners. It does not change the edge specification, but it does change how you execute the swap.
Two practical consequences matter for a fleet or distributor crew:
- Glazed steel and glazed ladder rungs are the primary slip hazard, not the plow blade itself.
- Ice in the fastener holes and between mating surfaces can prevent the edge from seating flat, which shows up later as uneven wear or loose hardware.
Pre-job checks before you touch the hardware
Most failed roadside edge changes trace back to something that should have been caught before the truck left the yard. In freezing conditions, the pre-job check is where you recover that time.
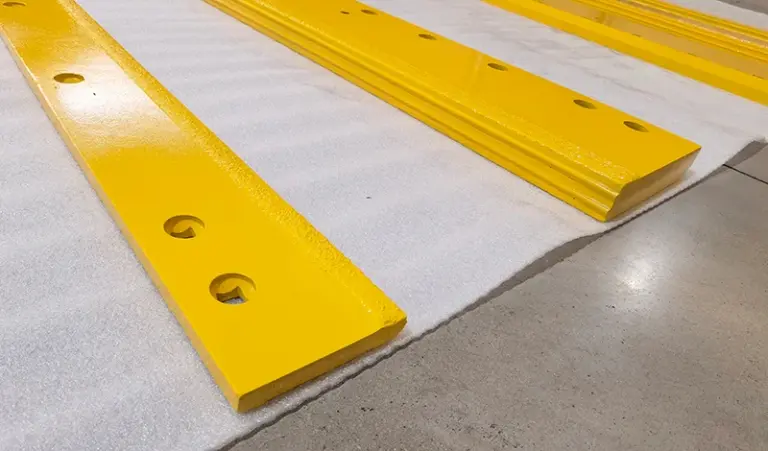
- Confirm the replacement edge part number, hole pattern, and thickness against the unit’s specification. Dimensions and hole spacing follow the product page specification.
- Stage the correct fastener kit: plow bolts, nuts, and washers matched to the edge and moldboard. Mixed or reused hardware is a common source of loosening.
- Check that the moldboard mounting surface is straight and free of built-up ice, packed snow, or old weld spatter.
- Verify lifting and support equipment is rated for the edge weight and that the plow is blocked or pinned before anyone works underneath.
- Confirm the crew has cut-resistant gloves, eye protection, and a way to keep fasteners dry and above freezing until installation.
Step-by-step: the change itself
Sequence matters more than speed. Work from a supported, stable position and treat every fastener as a two-stage operation: seat, then torque.
- Park on level ground, lower and block the plow, and lock out the hydraulic controls.
- Clear ice and debris from the moldboard face and from each fastener hole. A hole packed with ice will not let the bolt seat.
- Remove the old edge. If fasteners are seized, use controlled heat only where the manufacturer permits it; avoid heating the edge itself.
- Dry-fit the new edge and confirm hole alignment before installing any hardware. Do not force alignment with the bolts.
- Install plow bolts from the moldboard side, seat them, then torque in a cross pattern in stages rather than one pass.
- Re-check torque after the first operating cycle, since seating settles under load and vibration.
For a related field symptom — one end of the edge wearing faster than the other — see the checks in one end of the edge wearing faster before assuming the new edge is at fault.
Torque, hardware, and cold-weather behavior
Cold affects both the steel and the person turning the wrench. Torque wrenches should be at operating temperature and within calibration; a wrench left in a cold truck cab can read outside its rated accuracy band. Fastener condition matters as much as the setting.
| Item | What to check | Typical range / note |
|---|---|---|
| Edge thickness | Match to unit spec and moldboard | Depends on plow class; confirm on product page |
| Fastener condition | No thread damage, correct grade | Replace rather than reuse where doubtful |
| Torque | Cross pattern, staged passes | Follow OEM or edge supplier spec |
| Seating | Flat contact, no ice between surfaces | Re-check after first cycle |
| Edge wear life | Surface, abrasion, and duty cycle | Ranges widely; depends on substrate and route mix |
For specification detail on edge geometry and material options, refer to the product page rather than inferring from a worn original.
What this means commercially
For a distributor or fleet buyer, an edge change in bad weather is a supply-chain event as much as a maintenance task. The cost driver is rarely the edge price; it is downtime, rework, and premature wear from a poorly seated or mismatched part.
Practical points to plan around:
- Stock depth: keep a buffer of the highest-turn part numbers so a freezing-rain change does not become a wait-for-freight event.
- MOQ and lead time: both depend on part number, order quantity, and destination; confirm before the season, not during it.
- Total cost: factor in fastener kits, labor hours, and re-torque time, not just unit price.
- Specification risk: a wrong hole pattern or thickness creates fitment rework and returns; verify against the unit before dispatch.
Where volumes justify it, standardizing on fewer edge variants reduces both stock complexity and mis-fit risk across a mixed fleet.
After the change: verification and records
The job is not finished when the last nut is tight. A short verification pass protects both the equipment and the maintenance record.
- Run the plow through a full lift, lower, and angle cycle and listen for unusual movement.
- Re-check torque after the first operating cycle, then at the interval your maintenance program specifies.
- Record part number, install date, and any fitment notes so the next change is faster.
If you are evaluating edge options across a fleet, the cutting edge range is the reference point for part numbers and fitment.
Quick summary
Changing an edge in freezing rain is manageable when the work is sequenced around safe access, dry and correct hardware, and a staged torque pattern with a re-check after the first cycle. The dominant risks are ice in the mating surfaces and fastener holes, not the edge itself. Commercial planning — stock depth, MOQ, lead time, and fitment verification — determines whether the change costs an hour or a day.
Sources checked on 2026-11-18: SENTHAI Tools product page specification; general cold-weather maintenance practice for plow hardware; OEM torque guidance where available.
Three more perspectives
Limits
This page covers general practice for changing a plow cutting edge in freezing conditions; it is not a substitute for the OEM service manual, local safety requirements, or the specific torque and fitment values for a given plow. Wear life and cost figures vary with substrate, route mix, and duty cycle and are given as ranges, not guarantees. Dimensions and hole spacing follow the product page specification.