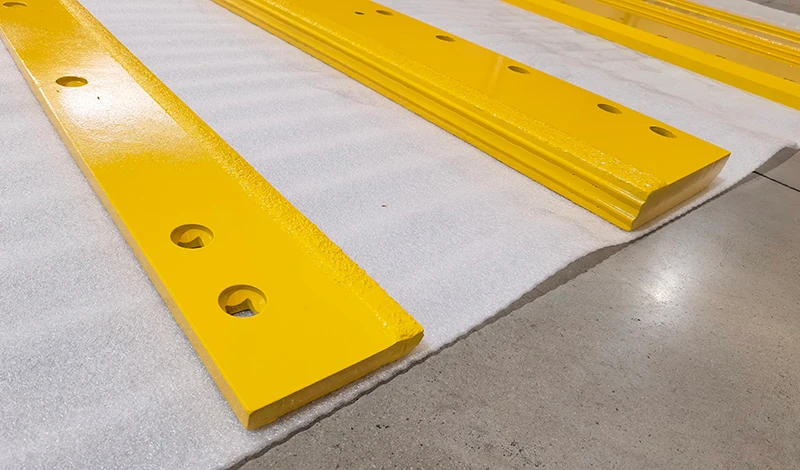
For carbide and cover cutting edge: pairing a wear cover with a carbide edge, the best result comes from matching the component, material, and setup to a documented operating condition, then validating fit, wear, safety, and cost in a controlled trial. This updated guide uses current search evidence and official-source checks to turn the topic into a repeatable selection process.
Updated: October 19, 2026
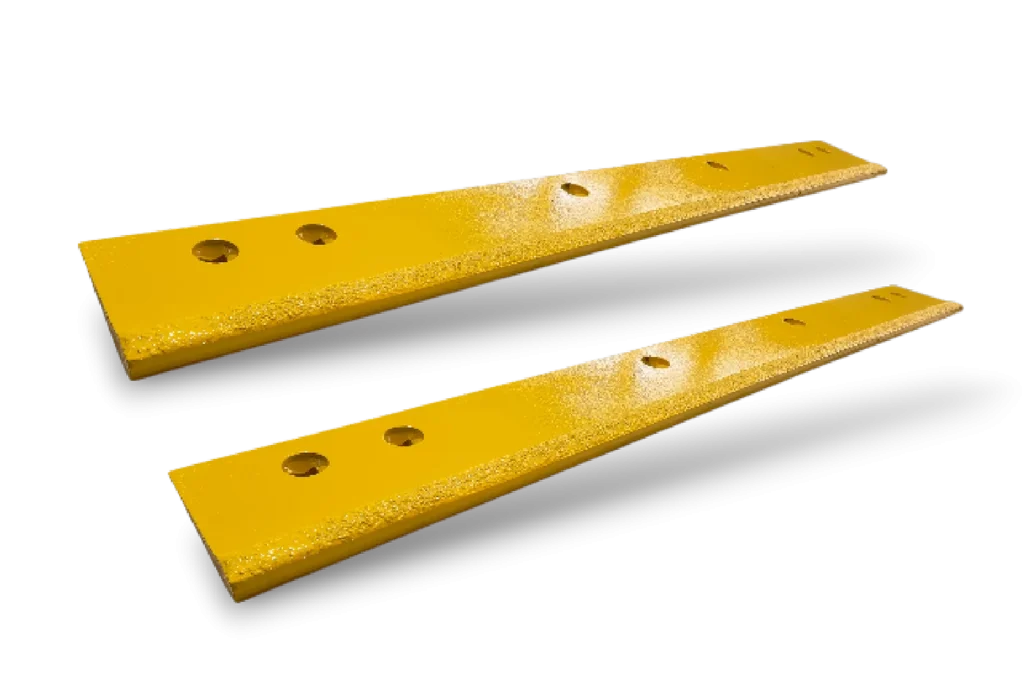
An edge that was specified as a carbide and cover assembly comes back with the carbide intact, the cover worn through and the carrier behind it distorted. The cover did its job and the carrier did not, because the two were treated as separate parts rather than as one load path.
A two-layer edge is a system: the cover absorbs impact, the carbide resists abrasion, and the carrier carries both. This article works through the load path, the fastening detail, the wear sequence and the situations where a cover is simply not needed.
What the cover edge actually protects
The cover absorbs impact so the carbide can resist wear.
A wear cover sits above the cutting edge to take the strikes that would otherwise reach the carrier and the insert bond, which keeps the carbide doing the one job it is suited to.
The distinction matters because buyers often assume the cover protects the carbide tip. It does not: the carbide is the wear surface, and the cover protects the structure behind it. The impact a plow edge meets on a real route arrives at the area just above the scraping line, not at the line itself, and that is the zone a cover occupies.
Covered assemblies therefore change two things at once. The carrier and the insert bond see less impact, which reduces debonding and distortion; and the wear surface becomes two parts with different roles, which means the cheaper part is the one that gets consumed. On a route with exposed joints and berms, that division is what keeps a carbide edge in service to the end of its wear life rather than retiring it early with intact inserts and a bent carrier.
Inspecting a two-layer edge before the season
The check that matters on a covered edge happens before the season, because once the cover has worn through, the base beneath it is already being worked. Four measurements describe the assembly, and each one has a failure it detects.
- Cover thickness at marked positions: detects wear that has removed the protection the cover was fitted for.
- Base edge condition under the cover: detects what happened the last time the cover was left in service too long.
- Clamping force at the fasteners: detects a joint that has relaxed and is letting the two layers move against each other.
- Clearance between the cover and the ground: detects a stack height that has changed the blade’s ground-following behaviour.
| Question | Cover layer | Base edge |
|---|---|---|
| What it protects | The base edge and the moldboard behind it | The mounting line and the blade body |
| What consumes it | Abrasion at the contact face and impact at fixed objects | Secondary wear once the cover is spent |
| How it is checked | Thickness at marked positions | Condition exposed when the cover is removed |
| What failure looks like | Localised thin spots, torn or missing sections | Dished material under the cover, elongation at the holes |
A covered edge that passes all four is doing the job it was specified for. One that fails the second check has already transferred wear to the part the cover existed to protect, which is the failure that turns a consumable into a repair.
Load paths through a two-layer edge
Adding a cover adds a second load path, and the way those two paths share load decides how the assembly behaves. The base edge takes the scraping load at the contact line; the cover takes the impact above it and spreads that load into the carrier; the fasteners hold both against the moldboard.
Three conditions keep the sharing predictable. The two layers have to sit flat against each other, because a gap concentrates load on the bolt line instead of distributing it. The cover has to be stiff enough to spread an impact rather than deflecting into the base edge. And the combined section has to remain within what the mounting expects, because a two-layer edge is thicker than the single edge it replaced and changes the geometry of the assembly.
Where an assembly is being specified from scratch, the useful questions are what the cover is expected to absorb, how that load reaches the carrier, and what happens to the fasteners when it does. The mechanical properties behind those claims are measured with the published test methods maintained by bodies such as ASTM International, and the standards work of AASHTO is the usual reference for edge and bolt patterns in North American highway practice.
Fastener spacing and clamping force
Fastener spacing does more work in a two-layer assembly than in a single edge, because the fasteners have to hold two parts together as well as hold the assembly to the machine.
Two failure modes follow from getting it wrong. Spacing that is too wide lets the cover lift between the bolts, which shows up as fretting and as a polished line along the carrier. Clamping force that is too high deforms the cover and pinches the layers, which distorts the wear line and can crack the cover at the holes over a season.
The specification should state the fastener grade, the hole diameter, the tightening sequence and the torque value, and it should say where the cover and base are clamped together rather than to the moldboard alone. Confirming torque after the first shift is standard practice for good reason: a new assembly beds in, and the figure that was correct at fitting is rarely correct after a few hours of work.
Wear sequencing between cover and base edge
The cover should reach its limit first. That is the design intent, and it is also the cheapest outcome, because the cover is the simpler part to replace and the one whose failure does not remove the edge from service.
Watching the sequence is a useful diagnostic. If the base edge wears faster than the cover, the cover is sitting too high and never contacting the road, or it is too thin to protect the carrier. If the cover wears in isolated patches rather than evenly, the layers are not flat against each other or the fasteners are not holding the two together along the length.
Where an assembly has been in service for several seasons, the wear sequence also indicates whether the replacement interval should be split. Replacing the cover more often than the base edge is normal on abrasive routes and is the reason the two parts are ordered separately rather than as a sealed unit.
Clearance and ground-following behaviour
Adding a cover changes the thickness at the wear face, and thickness changes how the assembly follows the ground. A two-layer edge sits lower in relation to the moldboard unless the shoe setting or the mounting is adjusted to suit.
The consequences appear quickly in use. An assembly that runs too deep loads the edge, raises scraping pressure and increases the impact it takes; one that runs too high leaves material behind and forces the operator to press down. Both outcomes are misread as blade problems rather than as a setting problem.
The fix is to re-establish the working height when the cover is fitted, using the same method that would be used for a new edge: set the shoes or skids, check the assembly on the surface it works on, and confirm the blade can still follow the surface rather than riding over it. On machines with limited clearance, this is the constraint that decides whether a cover can be used at all.
Replacement practice at change-out
Change-out is where a two-layer edge gives back the money it cost. The discipline is to treat the cover and the base edge as separate consumables with separate intervals, and to inspect the carrier whenever the layers come apart.
At each change-out, check the base edge for wear at the contact line and for distortion; check the cover for wear pattern and hole elongation; check the carrier for fretting, cracking and flatness; and check the fasteners for stretch and thread damage rather than reusing them indefinitely. Record the interval for each part separately, because a fleet that replaces the assembly as a unit loses the cost advantage it paid for.
Two practices make the records usable. Keep the batch reference with the unit so a premature failure can be traced, and photograph the wear pattern before the assembly is scrapped. The production controls and batch discipline behind those records are described on the SENTHAI quality control page, and a specific failure mode worth understanding before the next change-out is covered in the note on why carbide inserts come loose.
What a cover worn ahead of the base edge tells you
A cover wearing faster than the base beneath it is not a fault in itself: it is the design working, provided the wear stays inside the cover’s service life. The diagnostic value appears when the ratio changes, because the reason it changed identifies the problem rather than the part.
Three readings are worth comparing against the fleet’s own history. A cover wearing faster than usual on all machines points at the surface or the salt programme. A cover wearing faster on one machine points at the setting, the mounting or the operator. A cover wearing through in a localised area while the rest of it is serviceable points at an impact pattern on the route, and the location of that pattern will usually match a fixed object the planning walk noted.
Reading it this way turns the covered edge into an instrument for the route rather than a consumable line, which is the practical reason to record cover wear separately from base edge wear instead of treating the assembly as one part.
Deciding when a cover is unnecessary
A cover is not an upgrade in every application, and adding one where it is not needed creates its own problems. The decision follows the impact exposure of the route rather than the price of the edge.
| Condition | Cover recommended | Reason |
|---|---|---|
| Highway with bridge joints and berms | Yes | Impact reaches the carrier and the insert bond regularly |
| Abrasive chip seal, smooth surface | Optional | Low impact; the benefit is mainly spare capacity on the carrier |
| Gravel and mixed unpaved | Yes, with an impact-led grade | Stone strikes the area above the wear line |
| Machine with limited ground clearance | Only if height can be reset | Extra thickness risks losing ground following |
| Light seasonal work on smooth asphalt | Usually not needed | Impact exposure is low; the cover adds cost and weight |
Material behaviour behind these judgements, including how carbide grades and overlays differ in wear and toughness, is documented by producers such as Hyperion Materials & Technologies and Plansee, and the engineering standards for machinery interfaces are published by SAE International. The decision rule for a fleet is simpler: add a cover where impact, not abrasion, is retiring edges early, and leave it off where the assembly has room to work without it.
Match the Edge or Attachment to the Actual Operating Condition
This research-backed framework closes a recurring gap in pages ranking for Carbide and Cover Cutting Edge: Pairing a Wear Cover with a Carbide Edge: readers need a decision method, not a list of unsupported superlatives. Apply the same evidence fields to every option before choosing carbide and cover cutting edge: pairing a wear cover with a carbide edge.
| Decision gate | Evidence to collect | Release rule |
|---|---|---|
| Surface | Asphalt, concrete, gravel, pavers, bridge deck, or sensitive finish | Choose material and setup that protect the surface while meeting removal goals |
| Snow and ice | Loose snow, wet snow, compacted snow, bonded ice, or mixed conditions | Separate plowing, scraping, and deicing functions |
| Machine setup | Carrier weight, attack angle, down pressure, shoes, trip system, and speed | Verify the complete system rather than judging the edge alone |
| Validation | Short route trial, photographs, wear readings, fuel or time, and operator notes | Expand only after the trial meets a written acceptance rule |
The most useful choice is the one that meets the route objective without shifting damage or downtime elsewhere in the system. Record setup and operating conditions so the result can be repeated.
Run a Controlled Trial Before Full-Fleet Adoption
-
Freeze the baseline: record the current component, carrier settings, route, weather, operator, hours, and reason for removal.
-
Approve fit first: compare the supplier drawing with the machine and attachment. Do not drill, grind, weld, or substitute fasteners without an approved procedure.
-
Change one major variable: keep route and operating method as consistent as practical so the result can be attributed to the component rather than a different setup.
-
Inspect at planned intervals: photograph the same locations, measure wear, check fastener torque and retention, and log impacts or abnormal vibration.
-
Release against written criteria: decide in advance what wear, removal quality, downtime, and cost per operating hour would justify expansion.
Official-Source and SERP Verification
The technical boundary was checked against Federal Highway Administration snow and ice guidance. That source is used for the operating or safety context; model-specific dimensions, settings, and limits must still come from the approved manual for the exact machine and component. The following leading pages were reviewed for search intent and missing decision details:
Frequently Asked Questions
What should be verified before selecting carbide and cover cutting edge: pairing a wear cover with a carbide edge?
Confirm the exact application, dimensions, carrier limits, operating surface, expected impacts, supplier drawing, and acceptance evidence. A product name or grade label alone is not enough.
How should carbide and cover cutting edge: pairing a wear cover with a carbide edge be compared on cost?
Compare landed and installed cost, service hours, maintenance labor, downtime, collateral wear, and replacement reason. Use cost per operating hour for comparable routes rather than purchase price alone.
When is a trial required?
Use a controlled trial whenever fit, material, setup, route conditions, or supplier process changes. Define the baseline and pass criteria before the trial starts.
Which document controls installation and operating limits?
The current manual, approved drawing, and written instructions for the exact carrier and component control. General articles and cross-reference tables are screening tools, not installation authority.
Request an Application Review
Send SENTHAI the carrier or machine model, drawing or dimensions, operating surface, route condition, current failure mode, expected quantity, and target service interval. The engineering team can then review a suitable product path without changing the evidence requirements described above.