Four numbers decide whether a snow plow cutting edge fits: length, height, thickness and bolt spacing. Material comes after those four, not before. Most of the returns and mid-season changeouts we see trace back to one of the four being measured off the worn edge instead of the moldboard.
This page works through the four in the order that decides the result, then puts material in its proper place. If you already have the numbers, send them and skip to the quote checklist at the end. If you are still choosing between carbide, rubber and steel, the snow plow blade selection guide starts one level up.
This page is the method — how to take the measurements and in what order. If you already have the numbers and want reference values to compare them against, the cutting edge size chart is the lookup.
What a cutting edge actually does on a truck plow
The edge is a consumable that protects two more expensive things: the moldboard behind it and the pavement under it. It is bolted on, not welded, precisely so it can be replaced when it wears.
Everything the blade does passes through a strip of steel or carbide a few inches tall. Two jobs are happening at once. The edge has to scrape the surface hard enough to take snow and ice down to pavement, and it has to survive contact with joints, manhole rims, raised castings and, on some routes, gravel. Those two jobs pull in opposite directions: the harder the material scrapes, the more brittle it tends to be.
That is why the geometry is settled first. A correctly sized mild steel edge outscrapes a badly sized carbide edge, because a badly sized edge never sits at the angle the plow was designed for. The FHWA winter operations guidance makes the same point about matching equipment to the road rather than to the budget line.
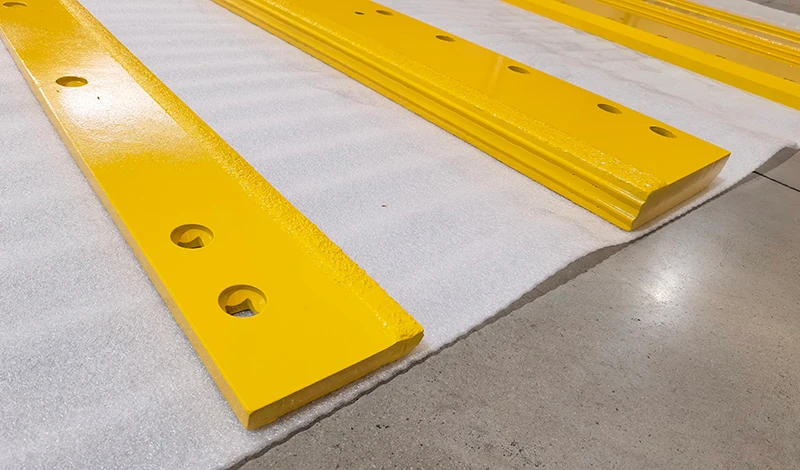
Length: measure the moldboard, not the worn edge
Length is the number people get wrong most often, because the worn edge is the easiest thing to measure and the worst thing to trust.
Edges wear unevenly. The centre of a straight blade usually carries the most abrasion, while the outer ends take the impact at curb lines and driveway cuts. Measure a worn edge end to end and you get the length of what is left, not the length the moldboard needs. On a segmented edge, the same mistake compounds across sections.
Measure the moldboard instead: the full width across the mounting face, from the outside of the left mounting flange to the outside of the right. Then compare that to the edge you intend to order. A plow built for a 96-inch edge will not accept a 90-inch one without leaving the ends short, and a 102-inch edge will not bolt down at all.
If the moldboard has been repaired or re-drilled, take the measurement at the mounting face and photograph both ends before ordering.
Height and thickness: what 3/8, 1/2 and 5/8 inch changes in service
Thickness is the single biggest lever on how long an edge lasts, and it is also the number most often “upgraded” without checking the machine.
A thicker edge resists bending and lasts longer between changes, but it also adds weight at the end of the plow, changes the load on the trip mechanism, and puts more torque on the mounting bolts. On a light-duty truck plow, fitting the heaviest edge available can cost you a trip-spring service in February. On a municipal single-axle plow, the same change is routine.
Height works differently. A taller edge gives more material to wear through, so it survives longer, but it also changes where the scraping edge sits relative to the moldboard lip. Fit an edge that is too tall and the plow rides on the edge rather than the shoes, which is fine on clean asphalt and expensive on gravel.
The table below is the range we see across common North American plow classes. Treat it as a starting band, not a specification: confirm against the machine’s mounting face and the trip mechanism before you commit.
| Plow class | Typical edge length | Common edge height | Common thickness | What usually decides it |
|---|---|---|---|---|
| Half-ton pickup, straight blade | 7 ft 6 in – 8 ft | 4 in – 5 in | 3/8 in | Trip load and front axle capacity |
| Three-quarter ton, straight blade | 8 ft – 8 ft 6 in | 5 in – 6 in | 3/8 in – 1/2 in | Route abrasion and changeout frequency |
| Single-axle municipal truck | 9 ft | 6 in – 7 in | 1/2 in – 5/8 in | Season hours and pavement type |
| Tandem-axle highway plow | 10 ft – 12 ft | 6 in – 8 in | 5/8 in – 3/4 in | Abrasion at highway speed, downtime cost |
Bolt pattern: spacing, countersink and edge orientation
The bolt pattern is the number that decides whether an otherwise correct edge can be fitted at all, and it is the one most often described loosely as “it fits a Western” or “it fits a Boss”.
Three details matter. Hole spacing is the distance between centres along the edge, and it is not standardised across brands or even across model years. Hole diameter and countersink determine which bolt heads sit flush; a plow that uses countersunk carriage bolts will not accept an edge drilled for plain hex heads without the heads standing proud and wearing away. Edge orientation matters on reversible edges, where the hole pattern is not always symmetric.
| Pattern detail | What to record | Why it matters |
|---|---|---|
| Hole spacing | Centre-to-centre, measured on at least three consecutive holes | Mis-spacing shows up as one bolt that will not start |
| Hole diameter and type | Bolt shank size, countersunk or plain | Flush mounting and wear on the bolt heads |
| Distance to first and last hole | From each end to the nearest hole centre | Ends that overhang or fall short of the mounting face |
| Symmetry | Whether the pattern mirrors around the centre | Whether the edge can be flipped and reused |
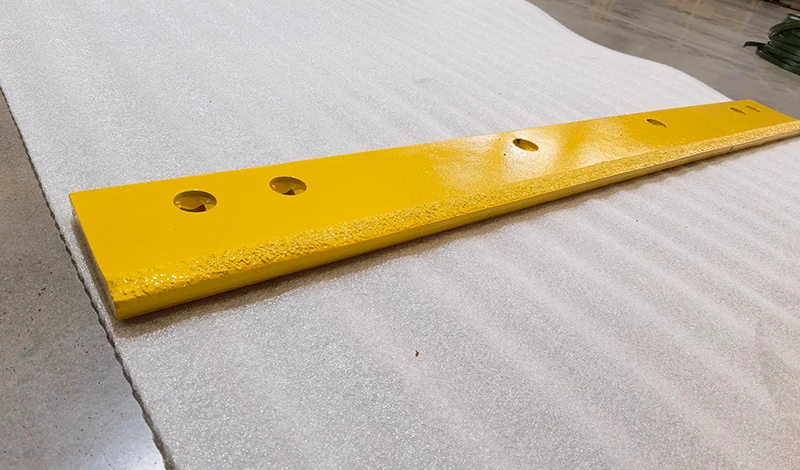
If you cannot identify the pattern, our note on mapping bolt patterns for aftermarket edges covers how to record it from a worn edge, and the length and thickness guide by truck class covers the ranges behind the table above.
Geometry first, material second
Once the four numbers are settled, material becomes a genuine choice rather than a guess.
Steel is the default because it is cheap, tolerant of impact and easy to source. Polyurethane and rubber edges protect decorative surfaces and reduce noise, at the cost of scraping power. Carbide holds an abrasive edge far longer and is the answer on chip seal, packed ice and high-hour routes where the changeout itself is the expense. What none of them fix is a wrong size: a carbide edge fitted at the wrong height simply fails expensively.
If carbide is on the table, the carbide snow plow blade page covers grades and mounting; the decision itself belongs after the geometry, not before it.
Edge angle and why the same edge lasts differently on two trucks
Two fleets can run the same part number and report very different life, and the difference is usually the angle at which the edge meets the road.
Down-pressure, shoe height and operator technique all change the effective attack angle. A plow set low with the shoes wound up scrapes harder and wears faster but clears better. The same plow set high leaves a film and wears slowly. Neither is wrong; they are different trades between clearing quality and edge life, and they should be a deliberate choice rather than whatever the last operator left behind.
Matching the edge to the plow, not to the catalogue
When you order, the supplier needs the machine, not the model year alone. A photograph of the mounting face with a tape measure across it answers more questions than a part number that may have changed twice.
Fleets that standardise on one edge across mixed plows usually end up with a compromise: a pattern that fits most machines and is slightly wrong on the rest. If you run mixed equipment, a short spec per machine class is worth more than a single SKU. Municipal crews that need a starting point on equipment matching can use the National LTAP Association network and the FHWA best-practice library.
What to send us for a size-confirmed quote
We quote from four measurements plus one photograph. Send the moldboard width, edge height, thickness and the hole spacing measured across at least three holes, with a photo of the mounting face showing a tape measure in frame.
If the plow is a brand we already hold a pattern for, the photo confirms it in minutes. If it is not, we reverse-engineer the pattern from the sample and confirm the drawing before anything is cut. Send the four numbers through the quote desk and you will normally have a quotation within one working day.
FAQ
What size cutting edge does my snow plow take?
Measure the moldboard width, the mounting face height, the edge thickness you are replacing and the hole spacing across three holes. Those four numbers identify the edge; the plow’s model year alone usually does not.
Can I fit a thicker edge for longer life?
Sometimes. A thicker edge lasts longer but adds weight at the end of the plow and load on the trip mechanism. On light-duty plows, confirm the trip rating before increasing thickness.
Can I flip a worn cutting edge and reuse it?
Only if the edge is a reversible design and the hole pattern is symmetric. Flipping a non-reversible edge leaves the bolt heads proud or the holes misaligned, and the second life is shorter than the first.
Is carbide worth it on a small plow?
Rarely on low-hour routes. Carbide earns its price where abrasive surfaces and high season hours make the changeout itself expensive, which is usually a municipal or highway plow rather than a single driveway.
Have the four numbers? Send the moldboard width, edge height, thickness and hole spacing with a photo of the mounting face. We confirm the pattern against your machine and quote the edge, packing and lead time together.
Download the measurement worksheet
Print it, fill it in at the machine, and send it with the photograph. It lists every field we need and where each measurement is taken.