Public agency and aftermarket specifications for JOMA-style rubber-flex systems commonly place steel wear segments on about 12-inch centres, each encased so neighbouring segments can follow crown and rut independently (see, for example, agency bid language for flexible carbide blades and manufacturer JOMA-style system sheets). That segmentation is why a rubber-flex edge can scrape uneven pavement without dragging a rigid bar. It is also why rubber flex segment failure rarely shows up as the whole blade dying at once.
In the shop, the first thing that fails is usually one bond line, one bushing, one clamp interface, or one carbide tip—then the neighbouring segments take uneven load and the edge looks “finished” overnight. This page is a shop diagnostic path for deciding what failed first, what is salvageable, and when a JOMA-style aftermarket segment set should be replaced rather than patched. It is not a stiffness proof article; for measured flex behaviour and how to record a stiff segment before you order, use the separate note on rubber-flex segment stiffness evidence.
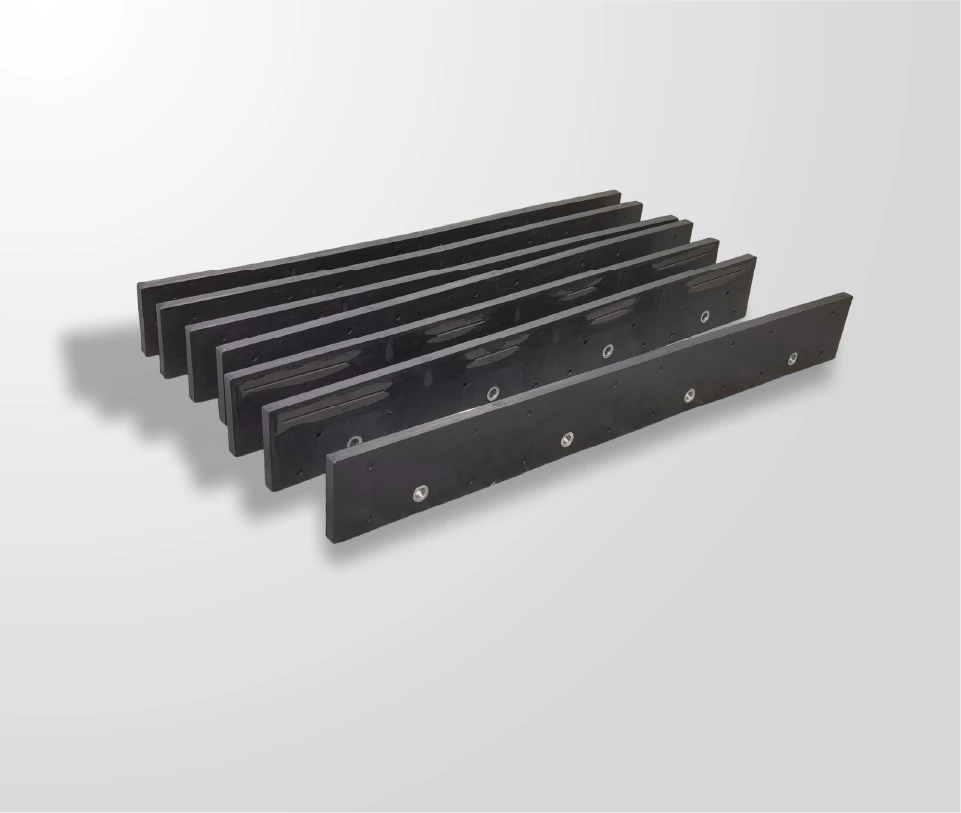
What “rubber flex segment failure” looks like on the bench
Start with the failure mode you can see, not the part number you hope to reorder. A useful shop split:
- Bond / vulcanisation failure — rubber peeling from the steel segment ears or from the carbide carrier, sticky or chalky fracture surfaces, rubber still soft but no longer gripping the metal.
- Segment loss or fretting — a segment missing, rotated, or hammered out of position; elongated bushing holes; metal-to-metal contact where rubber should isolate the segment.
- Carbide tip loss on an otherwise sound rubber housing — chipped or missing inserts in one segment while the rubber still holds geometry; often impact or braze issues rather than rubber aging.
- Clamp / hardware-driven damage — crushed rubber under the clamp bar, torn mounting holes, bent clamp, or bolts that worked loose mid-route.
- Temperature and chloride aging — hardened, cracked, or swollen rubber after salt brine exposure and freeze–thaw cycles, with segments that no longer articulate smoothly.
Photograph the edge square-on, from the end, and any peeled bond line before stripping clamps. Note truck, route class, and float versus heavy down-pressure—those notes decide repair versus replace.
Step 1: isolate the first failed interface
Work from the road face upward. Ask, in order:
- Is carbide missing or cracked on a segment whose rubber and bushings still look intact?
- Is the steel segment still bonded, but free to rattle because bushings or spacers wore oval?
- Has rubber detached from the cast or steel segment ears (classic bond failure)?
- Did a clamp bar or carriage bolt crush or tear the housing so the segment never had a fair chance?
Only one of those is usually the first failure. Everything after it is secondary damage. If you replace a lost tip without fixing a crushed clamp seat, the next tip leaves in the same place. The assembly overview in the JOMA flex blade guide is a useful map of housing, segments, and clamp hardware when you are naming parts for a work order.
Step 2: salt, temperature, and storage before you blame the compound
Chlorides and deep cold change how rubber-flex edges age, but they are not a free excuse for every peel. Shop checks that separate aging from abuse:
- Wash history — edges left coated in brine between storms often show earlier surface cracking on the rubber face.
- Storage — stacked segments compressed under other steel, or stored in direct sun on a trailer deck, can take a permanent set before the season starts.
- Cold starts — a housing that is stiff at the yard but soft after the first kilometres may be temperature, not a failed bond; wait until the rubber is near operating temperature before judging articulation.
- Mixed chemistry — magnesium chloride, calcium chloride and rock salt residues left in the clamp pocket accelerate corrosion at steel bushings even when the rubber face still looks black and “new.”
Uniform hardening with round bushings usually means end-of-life elastomer. A single peel beside glossy, flexible neighbours points to local overload, a bond defect, or clamp damage at that station.
Failure modes at a glance
| What you see | Likely first failure | Shop action | Usually repairable? |
|---|---|---|---|
| Rubber peeled from segment ears; steel still straight | Bond / vulcanisation line | Quarantine segment; do not re-glue as a structural fix | Replace that segment (or kit section) |
| Segment missing; bushing hole oval | Hardware fretting / lost retention | Check clamp torque history; replace bushings and segment | Often yes, if clamp bar undamaged |
| Carbide gone; rubber and bushings sound | Insert impact or braze | Compare to neighbouring tips; review route rock/curb hits | Segment swap if housing intact |
| Crushed rubber under clamp footprint | Over-torque or misaligned clamp | Replace housing section; correct clamp procedure | No for the crushed zone |
| Whole edge stiff, cracked, salt-whitened | Elastomer aging | Plan full edge replacement; improve wash/storage | No |
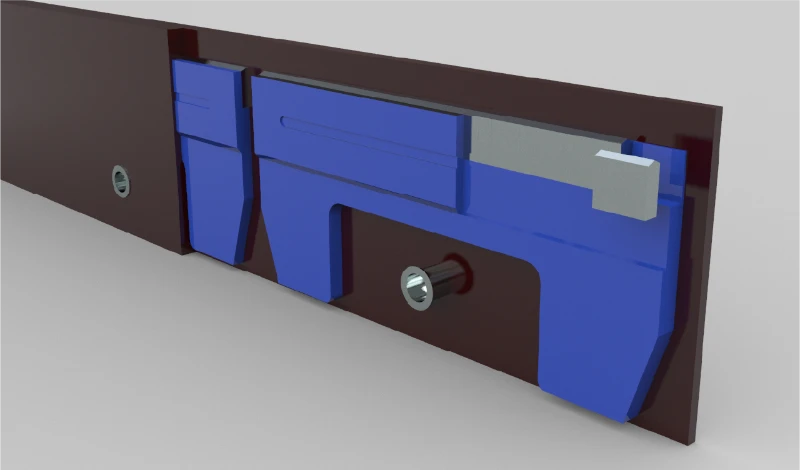
Step 3: JOMA-style aftermarket tone—measure, do not assume OEM identity
SENTHAI supplies JOMA-style aftermarket rubber-flex edges. Fitment is confirmed from drawings, hole centres, segment length (often 3 ft or 4 ft kits), and clamp hardware—not from OEM identity claims. Before ordering a replacement section:
- Record overall kit length, segment pitch, bushing ID, and clamp bar thickness.
- Note carbide tip shape and count per segment if tips are still present.
- Photograph orientation marks moulded into the rubber (front edge cues matter).
- State plow make/model and whether curb runners or backer blades were fitted.
That packet is enough for an aftermarket quote without pretending the worn edge is a branded OEM spare. Rigid carbide bars are a different product family; if the fleet is comparing flex housings to a continuous insert bar, keep the product pages separate—see the carbide snow plow blade page for rigid insert edges.
Step 4: repair versus replace—decision rules that hold up in audit
Shops waste money by scrapping housings that needed one segment, or “saving” edges whose bond has already let go. Practical rules:
- Replace the segment (or short kit section) when bond failure or tip loss is local, bushings on neighbouring segments are still round, and the clamp bar is straight.
- Replace the full flex edge when two or more non-adjacent segments have peeled, rubber hardness is clearly up across the set, or crush damage runs under the clamp footprint.
- Do not treat field adhesive as a structural vulcanisation repair. Cold-bond patches can hold a segment for a photo; they rarely survive the next hardpack week as a bonded system.
- Re-torque and re-check after the first storm on any edge that received new segments—loose hardware recreates fretting even with new rubber.
If your question is whether a segment has simply stopped articulating (stiff neighbour comparison) rather than peeled, gather the stiffness evidence first, then come back to this failure path. The two intents stay separate on purpose.
When the inspection pack is ready—photos of the peeled line or missing tip, kit length, bushing condition, plow make/model, and route notes—email them to [email protected]. Say whether you need a single JOMA-style segment section or a full rubber-flex edge. We usually reply within one working day in English or Chinese. Lead time is confirmed with the quotation for that product family; this page does not publish a blanket production schedule or MOQ count.
Where shops mis-read joma style segment wear
- Calling every missing tip “bad carbide” when the rubber already let the segment rock and hammer the inserts out.
- Reordering by plow brand nickname only without hole centres and segment pitch, then discovering the aftermarket kit is the wrong length.
- Ignoring clamp crush and blaming vulcanised carbide segment quality for a housing that was over-torqued.
- Mixing rigid carbide bar habits (expecting a continuous wear line) with flex edges that are supposed to show independent segment motion.
- Skipping wash and storage notes, so elastomer aging gets written up as a one-storm defect.
Inspection checklist before the next shift
- Walk the edge; mark any segment proud, recessed, or silent when neighbours flex.
- Look into clamp pockets for white salt crust and oval bushings.
- Check orientation marks so a reversed segment is not installed “to use the other side.”
- Log carbide height remaining on three segments (left, centre, right).
- File photos with truck ID before the edge goes back on the road.
FAQ
Is every peeled rubber-flex segment a manufacturing defect?
No. Bond lines can fail from clamp crush, fretting when bushings go oval, impact that levers a segment, or elastomer aging after chlorides and cold. A single early peel with sound neighbours and correct clamp torque is worth raising with the supplier; uniform aging across the set is usually service life, not a one-piece defect claim.
Can we glue a vulcanised carbide segment back into the housing?
Field adhesives are not a substitute for the original vulcanised bond. They may hold for a short emergency shift; for structural service, replace the segment or kit section and correct whatever caused the first failure (clamp, bushing, or overload).
How is this different from the rubber-flex stiffness evidence article?
That page is about recording and interpreting a segment that no longer articulates like its neighbours. This page is shop diagnostics for bond failure, segment loss, salt/temperature aging, and repair-versus-replace. Use stiffness evidence when motion is the question; use this checklist when something has already come apart.
What should an RFQ include for JOMA-style aftermarket segments?
Kit length, segment pitch or centres, bushing size, clamp bar details, carbide tip notes if visible, plow make/model, photos of the failed interface, and whether you want one section or a full edge. Fit is confirmed from those measurements—not from an OEM brand claim.
Buyer FAQ labeled; no People Also Ask results were captured for this keyword in our search research.
Related reading
- JOMA flex blade guide
- Rubber-flex segment stiffness evidence
- JOMA style blade (product)
- Carbide snow plow blade (product)
- More on blade selection and specification
Sources
- Clear Roads 17-02: Standard Specifications for Plow Blades with Carbide Inserts
- Clear Roads: Standardized Test Procedures for Carbide Insert Snowplow Blade Wear
- ASTM B294: Hardness Testing of Cemented Carbides
- FHWA Road Weather Management: Snow and Ice
- FHWA: How Does the Advanced Snowplow Cutting Edge Work?
- MnDOT Research: Smart Selection of Cutting Edges (2025 RIC)
- Example JOMA System product specification sheet (industry reference)