The realistic window for a truck plow edge change is roughly 30–90 minutes per blade position for a two-person crew, depending on edge weight, bolt condition, lift equipment and whether the wear bar is being reversed or replaced. The stop points that matter are not the turning of wrenches but the checks before and after: hole layout, bolt grade and torque, blade-to-moldboard fit, and the decision on whether the edge is worn out or merely worn.
What the job actually involves
A truck plow edge change is a handling and fastening task more than a mechanical one. The sequence is consistent across most straight-blade and V-blade moldboards, but the time and tooling vary with edge section weight and how the edge is attached.
Typical sequence for a single edge section:
- Park on level ground, lower the plow, and block the moldboard so it cannot drop.
- Clean the bolt heads and nuts — packed snow, road grit and salt residue are the main cause of rounded fasteners.
- Loosen and remove fasteners. Expect some to shear or require cutting on edges that have run several seasons.
- Support and remove the worn edge. Sections in the heavier size classes are a two-person lift or a mechanical lift.
- Clean the moldboard mating surface and inspect the bolt holes for elongation and cracking.
- Fit the new or reversed edge, confirm hole alignment, and install fasteners hand-tight.
- Torque in a cross pattern to the plow manufacturer’s specification for the fastener grade used.
- Re-check torque after the first few hours of operation.
Tools to have on the truck or in the bay
The tool list is short but the wrong list costs a shift. Impact tools are common, but on seized fasteners a controlled breaker bar often causes less damage than an impact wrench at full power.
| Category | Item | Notes |
|---|---|---|
| Fastening | Impact wrench or breaker bar, sockets to match plow hardware | Confirm socket sizes against the actual bolt heads, not the manual |
| Fastening | Torque wrench covering the specified range | Required for any warranty or fleet audit trail |
| Cutting | Angle grinder or cutting torch | For seized or sheared fasteners |
| Lifting | Floor jack, overhead hoist or edge trolley | Depends on section weight; heavier edges are not a safe manual lift |
| Cleaning | Wire brush, scraper, penetrating oil | Applied ahead of the job, not during it |
| Safety | Gloves, eye protection, blocks or stands | Non-negotiable on a raised moldboard |
Time: what moves the number
Time per position depends on four variables: fastener condition, edge weight, access, and whether the moldboard has been maintained. A clean, recently serviced plow with good hardware sits at the low end; a salt-season plow with corroded bolts sits at the high end.
Practical planning ranges, per edge position:
- Reversal of an existing edge, hardware in good condition: roughly 30–45 minutes with two people.
- Full replacement, hardware in good condition: roughly 45–75 minutes.
- Replacement with seized or sheared fasteners: 60–120 minutes, and occasionally longer if holes need reaming or the moldboard needs repair.
- Multi-section blades: add handling time per section; the per-section time does not fall much because setup and blocking are repeated.
These are planning ranges, not measured standards. Actual times depend on crew experience, bay layout and the specific plow model.
Stop points before the edge goes on
Most premature edge failures trace back to something that was visible before installation. These are the checks worth stopping for.
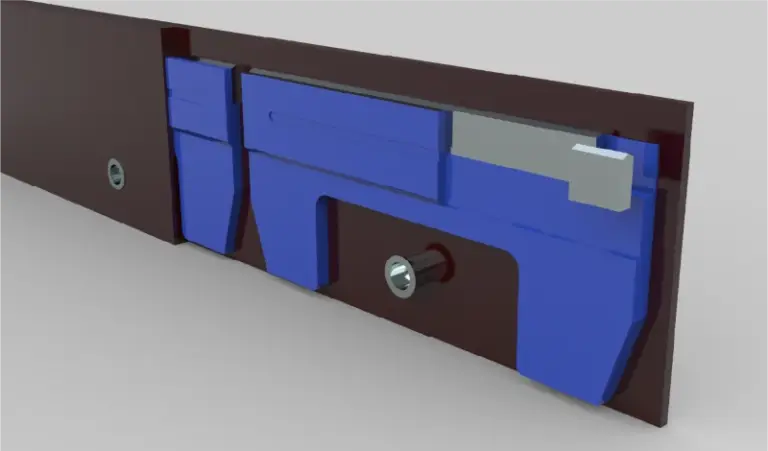
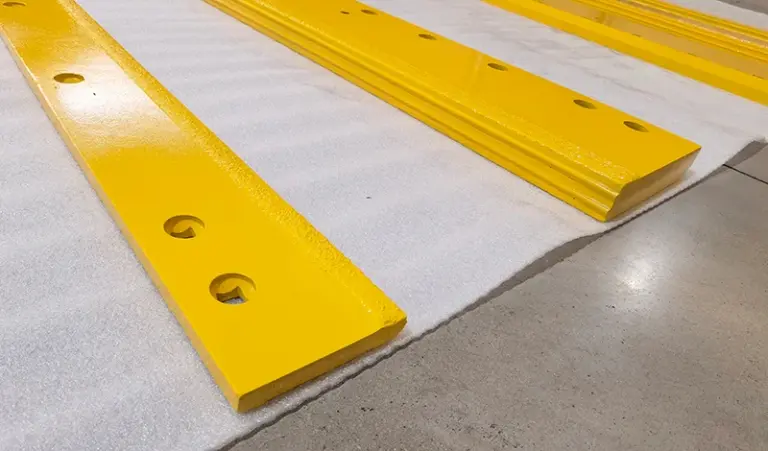
- Hole layout and spacing. Compare the new edge against the old one and against the moldboard. Off-pattern holes force elongation and loosen fasteners in service.
- Edge thickness and section length. Confirm the specification matches the moldboard and the intended application — a highway-class edge and a lot-clearing edge are not interchangeable.
- Moldboard condition. A worn, bent or cracked moldboard will not hold a new edge flat. Check the mating surface for distortion.
- Fastener grade and length. Plow bolts are specified for a reason. Mixing grades or using over-length bolts creates clearance and wear problems.
- Wear pattern on the old edge. Uneven wear — one end down, centre worn through — points to a moldboard or adjustment issue that a new edge will not fix. See our notes on edge and pavement strike checks for the diagnostic side.
Check the drawing and hole layout on the product page before ordering.
Commercial view: supply, MOQ and total cost
For a distributor or fleet buyer, the edge change interval drives inventory policy more than the unit price does. The practical questions are how many positions a fleet consumes per season, what the minimum order quantity is per specification, and how long replenishment takes.
Points worth building into the purchasing model:
- MOQ and specification spread. Cutting edges are usually ordered by hole pattern, thickness and length. A broad specification range raises the risk of carrying slow-moving stock; a narrow range raises the risk of stockouts mid-season.
- Lead time. Sea freight from Thailand to most export markets runs in weeks, not days. Fleet buyers typically want a buffer of one full change cycle on hand before winter.
- Total cost per position. Include fasteners, labour hours, downtime and disposal of worn edges — not just the edge price. A lower-cost edge that needs more frequent changes can cost more per operating hour.
- Specification risk. An edge that is dimensionally correct but metallurgically mismatched to the application will wear fast or crack. Confirm the grade and hardness range against the duty cycle, not just the drawing.
- Reversal policy. If the edge design allows reversal, plan the change interval around two lives per edge rather than one. This changes reorder quantities materially.
After installation: the first-hours check
Fasteners settle. A torque re-check after the first few hours of plowing is the single cheapest reliability step available, and it is the one most often skipped under time pressure.
Also worth logging: which positions wore fastest, what the wear pattern looked like, and how many fasteners had to be cut. Over two or three seasons this record tells a fleet more about edge specification fit than any catalogue figure.
Quick summary
Plan on roughly 30–90 minutes per edge position depending on hardware condition and edge weight, and treat hole layout, fastener grade and moldboard condition as hard stop points before installation. Commercially, the change interval — not the unit price — should drive MOQ and buffer stock decisions.
Sources checked on 2026-11-17: SENTHAI Tools product documentation and drawing conventions for plow cutting edges; general industry practice for plow bolt torque and edge reversal; standard workshop safety practice for raised moldboards. Time and life ranges are planning estimates, not measured test data.
Three more perspectives
Limits
This page is a planning guide, not a service manual. It does not cover plow hydraulic systems, moldboard structural repair, or manufacturer-specific torque values, and it does not substitute for the plow OEM’s installation instructions. Time ranges are estimates that depend on condition and crew; they are not guarantees. Always confirm the drawing, hole layout and fastener specification for the specific part before ordering or installing.