Expect a skid steer cutting edge change to take roughly 45–120 minutes per machine for a two-person crew, depending on bolt condition, rust, and whether the edge is a bolt-on or a segmented design. The tools that matter most are an impact wrench rated for the bolt grade, a brass drift, a dead-blow hammer, and a scraper for the moldboard lip. Stop points are the bolt torque spec, edge-to-floor clearance, and plow-shoe height.
What the job actually involves
A skid steer cutting edge change is a wear-part replacement, not a repair. The work is unbolting the old edge from the moldboard, cleaning the mating surface, and torquing a new edge to the OEM specification. The variables that drive time are bolt condition and access, not the edge itself.
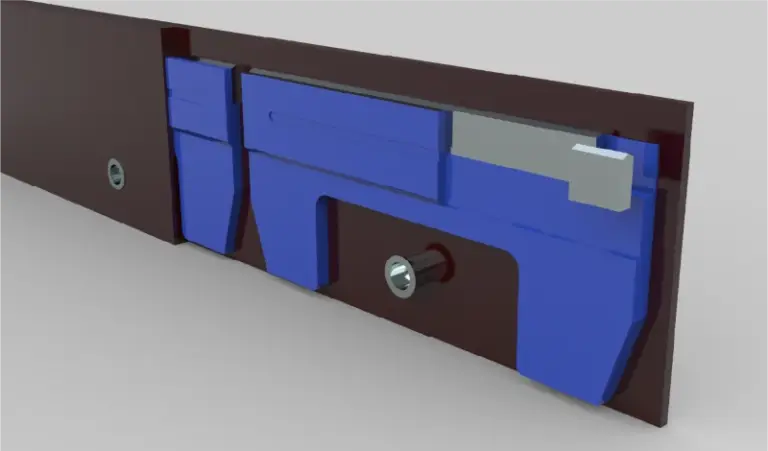
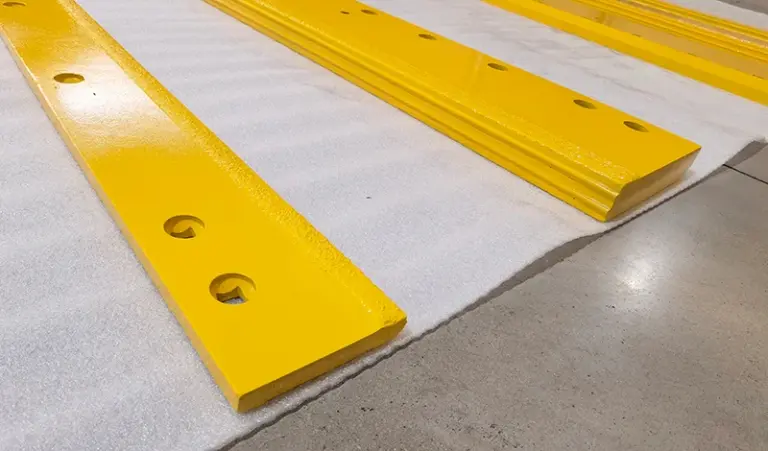
Most skid steer buckets use a bolt-on edge with 6–12 plow bolts depending on width. Segmented edges use more fasteners but allow partial replacement. The sequence below assumes a standard bolt-on edge.
- Park on level ground, lower the bucket flat, engage the parking brake, and block the bucket so it cannot drop.
- Wire-brush and penetrate the bolt heads and nuts the day before if the machine has been in service more than one season.
- Remove nuts with an impact wrench; if a bolt spins, apply heat to the nut face, not the bolt shank.
- Drive stubborn bolts out with a brass drift and dead-blow hammer. Do not use a steel punch on a plow bolt head.
- Scrape the moldboard lip and bolt holes clean. Rust scale under a new edge causes uneven seating and premature bolt loosening.
- Trial-fit the new edge, check hole alignment, then install bolts finger-tight from the center outward.
- Torque in a cross pattern to the OEM specification for the bolt grade and size.
- Re-check torque after the first few hours of operation.
Tools that earn their place
The tool list is short, but the wrong impact wrench or a missing drift turns a one-hour job into a half-day job. Grade 8 plow bolts on a worn bucket often need more breakaway torque than a 1/2-inch drive tool will deliver.
| Tool | Why it matters | Notes |
|---|---|---|
| Impact wrench, 3/4-inch drive or better | Breaks corroded plow bolts | Match socket to bolt head type |
| Brass drift and dead-blow hammer | Removes bolts without mushrooming heads | Steel punches damage plow bolt heads |
| Scraper and wire brush | Cleans moldboard lip and holes | Rust scale causes loose bolts |
| Torque wrench | Final tightening to spec | Impact wrenches do not torque accurately |
| Anti-seize compound | Eases next change | Apply to threads, not the seating face |
| Lifting aid or second person | Handles edge weight safely | Segmented edges reduce lift weight |
Time expectations and where they slip
Realistic time ranges depend on machine condition, not on the edge brand. A clean bucket with recently installed bolts can be done in under an hour; a bucket that has run two winters on the same fasteners can take two to three times longer.
Where time slips: seized or spinning bolts, elongated or rusted holes, a bent moldboard lip that will not seat a new edge flat, and edges that arrive with a hole pattern that does not match the bucket. The last item is a specification risk, not a workshop problem, and it is covered below.
Stop points before the machine goes back to work
Three checks decide whether the change is finished. Skipping any of them shortens edge life or damages the bucket.
- Bolt torque. Confirm every fastener is at the OEM specification for its grade and size. Re-check after the first few hours.
- Edge-to-floor clearance. With the bucket flat on the ground, the new edge should sit flush or at the manufacturer’s specified clearance. A gap or interference means the moldboard lip is bent or the edge is the wrong profile.
- Plow shoe or skid height. If the machine runs shoes, set them so the edge wears evenly across its width. Uneven shoe height produces a tapered wear pattern.
One more stop point applies before ordering, not after: check the drawing and hole layout on the product page against the bucket on the machine.
Wear life and when to change
Edge life depends on surface, down-pressure, operator technique, and abrasion class of the material being moved. As a working range, a bolt-on edge in mixed gravel and asphalt work might last one to three seasons, while abrasive sand or repeated concrete scraping can wear an edge out in months. There is no single figure that applies across fleets.
Change points to watch: loss of edge thickness at the center relative to the ends, a rounded or back-tapered leading edge, and bolt heads worn to the point where the socket no longer grips. Once the bolt heads are worn, the next change gets significantly harder, so replacing fasteners with the edge is usually the lower-cost decision.
The commercial side: supply, MOQ and specification risk
For a distributor or fleet buyer, the edge itself is a small share of the total cost of a change. Labor hours, downtime, and fastener replacement usually dominate. That changes how supply terms should be evaluated.
MOQ and lead time depend on the edge profile, width, and whether it is a standard or custom hole pattern. Standard profiles are typically stocked; custom drilling or non-standard widths carry longer lead times and higher minimums. Ask for the hole layout drawing and material grade before committing to a volume order, and confirm the bolt grade the edge is drilled for.
Specification risk is the item most often underestimated. A hole pattern that is close but not exact, or a hole diameter that suits a different bolt grade, creates a fit problem at the machine, not at the supplier. That is why the drawing check belongs in the purchasing process, not the workshop. For buyers comparing suppliers, the SENTHAI Tools product range lists profiles and hole layouts that can be matched against the fleet’s buckets before an order is placed.
Common failure points after installation
Most premature edge failures trace back to installation, not material. Loose bolts, rust scale under the edge, and incorrect shoe height account for a large share of short service life. Field teams should also watch for edge contact with pavement fixtures; the interaction between edge geometry and raised pavement markers is covered in this field note on edges and in-pavement lights.
Bolts that loosen in the first hours usually indicate incomplete seating or under-torque. Re-torque is a scheduled step, not an optional one.
Quick summary
A skid steer edge change is a 45–120 minute job for two people, driven by bolt condition and hole fit rather than the edge itself. The critical stop points are torque, edge-to-floor clearance, and shoe height, with the drawing and hole layout confirmed before ordering. Life and cost figures are ranges that depend on abrasion, down-pressure, and operator technique.
Sources checked on 2026-11-15: SENTHAI Tools product documentation and hole layout drawings; general workshop practice for plow bolt removal and torque sequencing. No independent wear study was cited; life figures are working ranges, not measured test results.
Three more perspectives
Limits
This page covers bolt-on skid steer cutting edges and general workshop practice. It does not specify torque values, bolt grades, or hole dimensions for any particular bucket; those come from the machine OEM and the edge drawing. It does not cover weld-on edges, loader bucket edges, or grader blades. Wear life and cost ranges are indicative and depend on operating conditions.